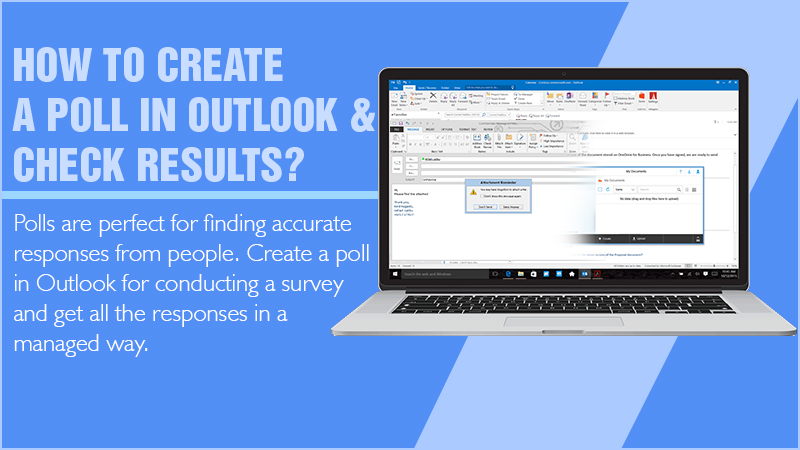
How To Create a Poll in Outlook & Check Results?
Sometimes, getting a consensus on a question can feel complicated. The barrage of replies you get in a group email can render anyone unable to decide on a single option. Well, Outlook comes to your rescue with its poll feature. It’s a great function to determine the majority opinion. But how do you create a poll in Outlook? It’s easier than you think.
Keep reading this post to know the exact steps.
What are the Steps to Create a Poll in Outlook Desktop Client?
The poll feature is available in both Outlook client and Outlook on the web (Outlook online). Here’s how to create a poll on the Outlook desktop client.
- Open the application of Microsoft Outlook and click Insert > Poll in a new email.

- Now, you will see a panel on the email’s right side. Here you will input your question and its different answers.
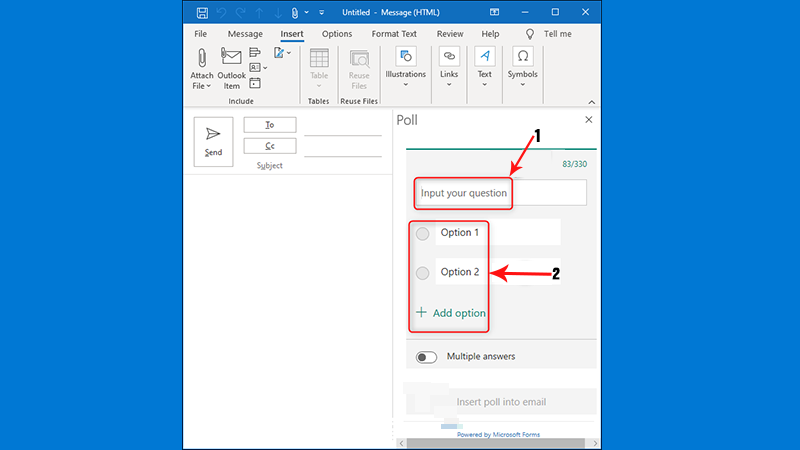
- You can only ask a single question in one email poll. But you can enable several answers.
- After you have completed your poll, tap the ‘Insert poll into email’ button.
- Now, you will see the subject line of the email changed. A link to the poll will be placed into the email’s body.

- When the email reaches the recipients, they can click the link and answer.
- You will automatically be Cc’ed in the email so that you can also vote.
How to Create a Poll in Outlook on the Web?
Although the poll functionality is only available for Microsoft 365 and Office 365, anyone who has provided their mail can answer it. Given below are the steps to create it on Outlook online.
- Launch the Outlook website and compose a new email.
- You will see a three-dot menu icon far below the email. Click it and select ‘Poll.’

- On your right-hand side, a panel will open. Here you can input your question and different answers that you expect.
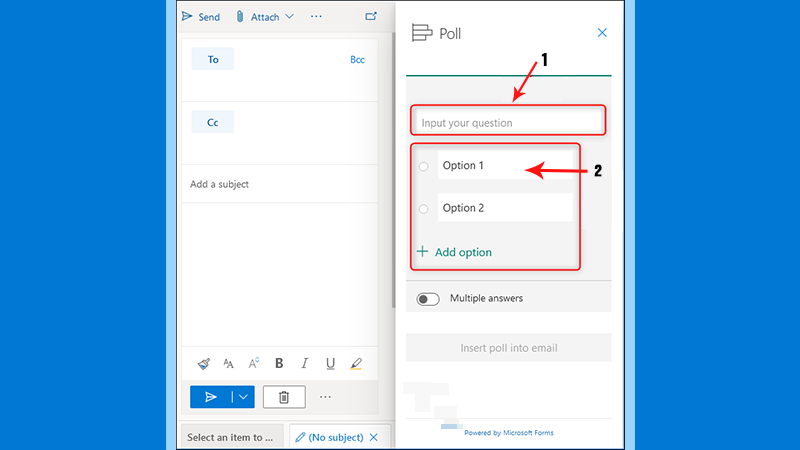
- After the poll is finished, tap ‘Insert poll into the email.’
- You will notice that the subject line of the email changes. A link to the poll will be inserted into the email’s body.
- This email will be Cc’ed to you along with your recipients.
How to Check the Poll Results?
You can notice the overall results in the voting card present in the email’s body. If you want to see the most recent results, click Refresh. To view detailed responses of your recipients on forms.office.com, click View in Forms. If you wish to update yourself with more comprehensive results, click on the poll link in the email’s body.
What to do if Your Recipients Cannot See the Poll?
Sometimes your recipients will be unable to view the poll. It can happen because of the reasons mentioned below.
- You might have created a very lengthy poll.
- And you may have signed in with your Microsoft school account and sent the poll to those outsides of your company.
You can also check: How to refresh Outlook 2010 manually & Automatically?
Final Words
The poll functionality is ideal for determining the opinions of your colleagues, relatives, or friends. Say goodbye to the old voting options. Now that you know how to create a poll in Outlook, you can start using it for any professional or personal task.