Steps To Schedule An Email In Gmail

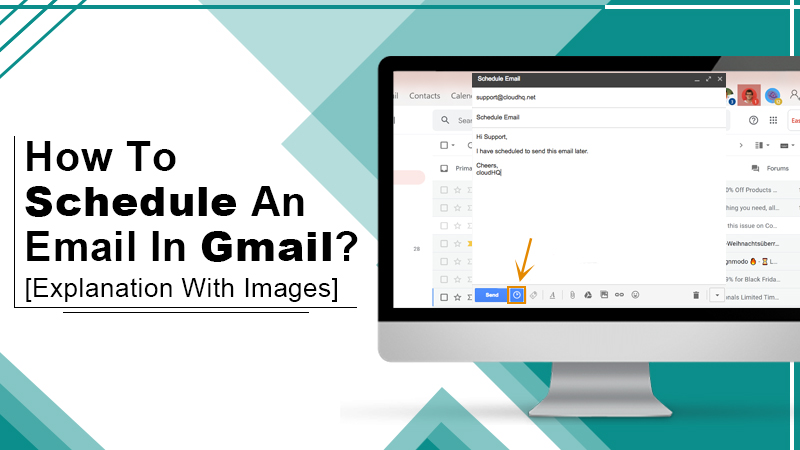
Do you email your team members frequently during working hours? Well! You can take the benefits of the “Schedule an email in Gmail” feature that allows the users to schedule their emails for delivery later or on a specific date.
Google email services have been trusted by billions of people worldwide for sharing personal and professional documents with team members, family, and friends. Previously, the users needed to rely upon third-party add-ons for scheduling the emails.
Thankfully, this Gmail feature has made the task easier. It is simple to schedule the emails in Gmail. The feature is extremely helpful when the users need to get connected to someone from a different time zone or update someone about the upcoming event, and even to stay up-to-date with the future task.
Also check: How To Recall An Email In Gmail?
So, let’s move ahead and find how you can schedule an email in your Gmail account.
How to Schedule an Email in Gmail on Computer & Smartphone?
It is handy to schedule an email in Gmail if you are a regular Gmail user. The email scheduling in Gmail will let you efficiently handle the workflow for both yourself and the team members. Also, you can schedule personal emails to share with your friends and family members. Here is How to schedule an email in Gmail on desktop and smartphone applications.
1. Schedule an Email in Gmail on Computer: Steps to Follow
Before you proceed with the steps below for scheduling an email, we recommend you make sure that your device is connected to the internet and getting a proper power supply. Such technical defaults can cause trouble for you while using the Gmail services, so it’s better to keep a check on everything before:
- Open your Gmail account on the computer from the web browser.
- Now, compose the email that you want to send.
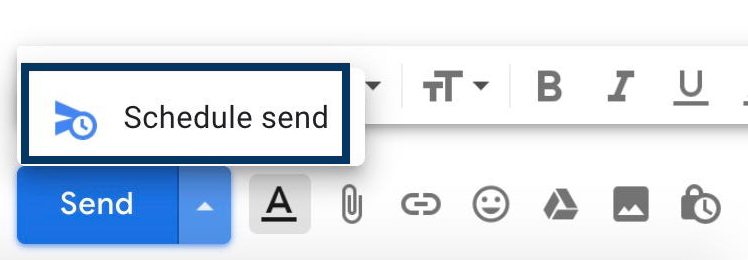
- Once you have composed the email, you need to tap on the “Blue” button with the down arrow. You can find this button next to the “Send” button. Do not click on the “Send” button.
- Click the “Schedule Send” button.

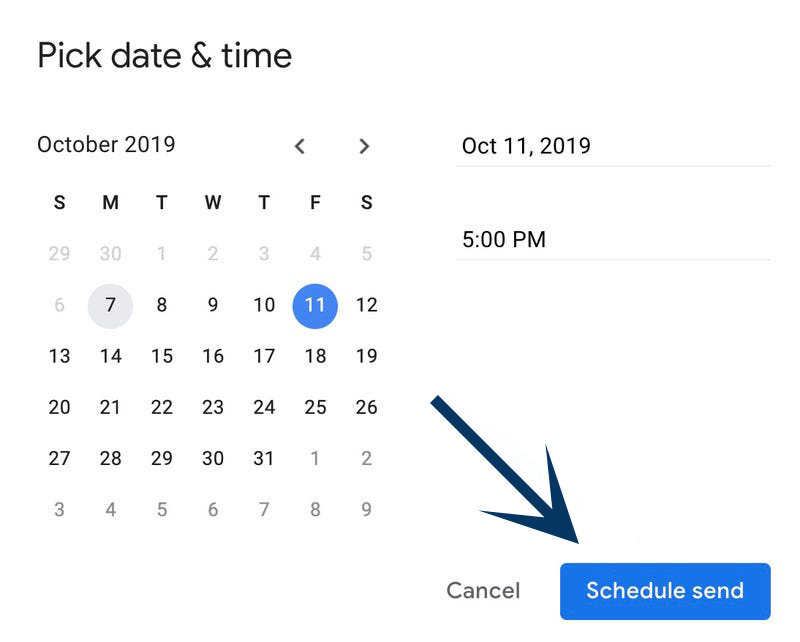
- Now, you will be shown the present times. Now, you need to select the time with a click on it. For scheduling the email to be sent at a specific time, you need to tap on the “Select date and time” option.

- After this, click on the date you would like to set for sending the email.
- Click on the time to mention the exact timing on which you would like to send an email.
- Click on the “Schedule Send” button.

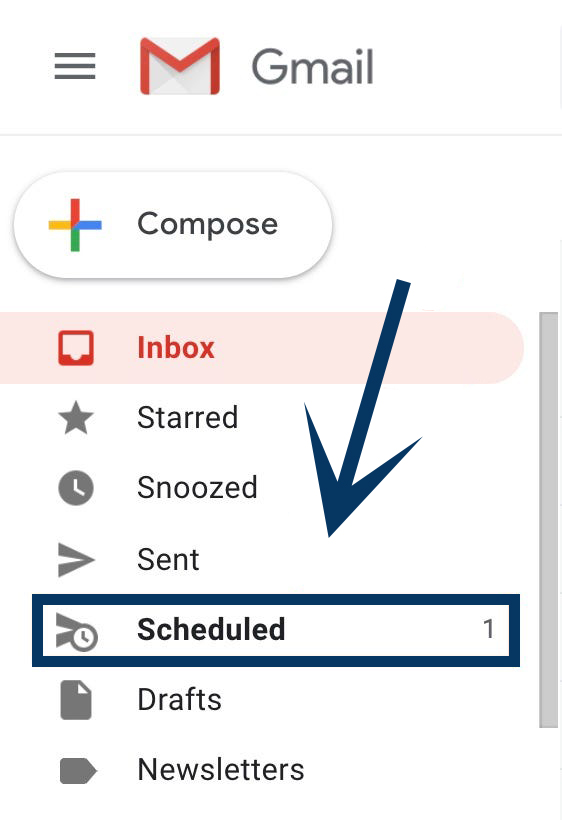
That’s All! Your email is now scheduled to be sent. Before the email is sent, you can check it in the “Schedule” folder of your Gmail account. From this folder, you can edit the email content, and also reschedule the email for different times. You can cancel the email if you do not want to send it at the scheduled time.
We hope that now it is pretty clear how you can schedule an email in a Gmail account using the desktop. If you want to learn how you can schedule an email from the smartphone device, keep reading.
2. Schedule an Email in Gmail Using the Smartphone Device
- Open the Gmail application on your mobile.
- Login to your Gmail account.
- Now compose the email that you want to send.
- After composing the email on your Gmail app, you need to tap on the “Three-dot symbol” present next to the “Send” button.

- Click the “Schedule Send” option.
- You need to tap on one of the present times for scheduling your email in the Gmail account. Or, you can tap on the “Pick Date and Time” for choosing the time as per your preference.
- Once you tap on the “Pick Date and Time” option, choose the preferred date and time.

- Click on the “Schedule Send” option.
You are done here! Your email is scheduled successfully to be sent on the predefined date and time. If you want to check the email, you can visit the “Scheduled” folder on your Gmail account and make the changes (if required). You can open the email message to edit, delete, cancel, or reschedule.
Read Also: How To Export Gmail Contacts?
Steps to Update or Delete the Scheduled Email?
- In case, you do not want to send the email later after scheduling it, you can delete it before the scheduled time. For this, you just need to click on the “Scheduled” option from the “Main Menu”.

- From here, you need to tap on the email that you would like to delete, choose the “Cancel Send” option.
- If you want to update the date and time of the email you have scheduled for sending, click to cancel the email. Thereafter, you will see a draft appearing from here you can edit the email and make the necessary changes you want. After that, repeat the above steps for sending the email later.
Conclusion
We hope after following these simple steps you will get to know How to schedule an email in Gmail using the computer or smartphone device. The provided steps are pretty easy to follow. So, if you haven’t used this feature to schedule the emails in your Gmail account yet, it is time to use it now and ease your workload.
The scheduling feature can completely transform your Gmail experience. Scheduling will let you pick the preferred date and time for sending the email. This feature is quite similar to the Boomerang. You can schedule the emails up to years in advance.
Scheduling email messages works perfectly for personal and professional tasks using both smartphones and computers. However, if you are still unable to schedule an email in Gmail and looking for help, we recommend you to contact the Gmail support team. The experts will provide you all the necessary help and support you need to make Gmail work best for you.
You can contact the experts at any time of the day, the professionals are available around the clock to help. So, get in touch with the team today and get immediate assistance for the Gmail services.