Schedule An Email In Outlook | Here’s How To Do It!

There are times when users may deliberately want to delay their Outlook email and schedule it to send later. In such situations, the user does not want to revert to email instantly, rather schedule it for later delivery so it’s automatically sent to the user’s address at the pre-defined time. If you also want to schedule an email in Outlook, this post can help you.
Here, we will share some simple instructions that will let you schedule the Outlook email for delayed delivery. For more details, keep reading!
How to Schedule An Email in Outlook?
There is no use in sending an email to the recipient if the recipient is not available to see it. Rather, you can just choose a specific time in which the recipient usually checks the emails, and sends them. It is not difficult to schedule an outgoing email in Outlook, you just need to follow some simple instructions and you will be done with the task.
In the post below, we will show you how to schedule an email in Outlook account, or set a standard delay for all outgoing emails.
Steps to Schedule an Outgoing Email in Outlook
Knowing how to schedule an email in Outlook can help you to plan your outgoing emails in advance. This will not only let you have a quality email experience with Outlook but also make things easier. You can enjoy the perks like instant response, better communication, and more. Have a look at the step-by-step instructions to schedule an email in Outlook:
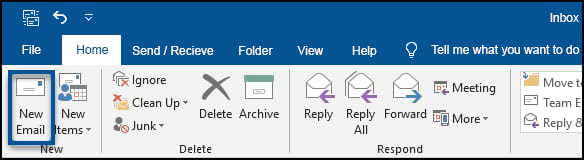
- Open your Outlook account.
- Click the “new email” option. For shortcuts, you can simply press the “CTRL+n” key together.
- The new window will open From here, choose the “Options” tab.
- Click “Delay Delivery”.

- The dialog box will appear. Now, you have to choose the specific date and time on which you would like to send an email.

- Hit the “Close” button.
- Compose the new email from the message window, hit the “Send” button.

These are the simple steps that can help you to schedule an email in an Outlook account. To find the scheduled email, you can always check the outlook folder. And, if you like to reschedule the email, click on “Message”, Choose “Delay Delivery” make the necessary modifications, and hit the close button.
And, later, if you like to directly send the message without any delay, you can simply remove the email settings and send your message right away.
Also Check: How to Repair the Damaged or Corrupted Outlook PST Files?
How Can I Delay Sending All Emails in Outlook?
If you schedule the individual emails, you can plan for each and every outgoing email in your Outlook account. But, if you want to delay all the emails together, you need to make certain changes in the settings. Below, we are sharing some easy instructions that can help you to schedule an outgoing email in Outlook.
Choosing the delayed delivery option for All the emails can help those users who want to avoid the embarrassment that may cost due to not sending the messages.
Instructions to Delay Sending All Outgoing Emails to Outlook Account
- Go to the “Outlook” account.
- Open the “File” tab.
- Go to the “info” section.
- Choose the “manage rules and alerts” option.
- A dialogue box will appear on your screen, from here, choose the “email rules” option.
- Click on the “new rule”.
- The rule wizard will pop up on your screen. From this wizard, choose “Apply the rule on messages I send”.
- You can find this option under the “start from a blank rule” section.
- From the “select conditions” list, tap on the checkboxes you would like to apply to your outgoing emails. Clear to checkboxes and hit the next button.
- If you are unable to choose the checkboxes, hit the “Yes” button and it will apply the rules for our outgoing emails.
- Now, from the ” select action” list, choose the checkbox is saying that ” delay delivery by a number of minutes”.
- Choose the “a number of” option from the bottom.
- A dialog box will appear on your screen from where you have to choose the number of minutes you would like to delay your email. You can schedule an email in Outlook for a delay of a maximum of 120 minutes.
- Once you have set the delay time, hit the ok button.
- In the rule wizard, Hit the “next” button.
- Now, if you would like to include any exceptions for the delayed messages, you can set them here. After that, hit the “next” button.
- Provide an appropriate name for your email rule in the description box for the rule.
- Check the “turn on this rule” checkbox.
- Once you are done, click the “next” button.
- Choose “Apply” and hit the Ok button.
After this, whenever you schedule an email in Outlook, it will be delayed automatically for a number of minutes you have set, and then sent automatically. As we have mentioned before, you can find these emails in the outbox.
Also Read: Schedule An Email In Gmail
The Lasts Words
These are some simple guidelines that can help you to delay emails in Outlook. So follow the steps carefully as you schedule an email in Outlook to send it later. The option is very helpful for those who struggle to connect to friends and family members at a specific time.
Scheduling the emails in Outlook also helps to increase the email response rate, and share a better mailing experience with the users. The post above is clearly defining the simple points you can follow to schedule an email in Outlook for later delivery. The instructions are simple and easy to follow.
But, if you are still having trouble scheduling an email in Outlook, do not hesitate to contact the Outlook support experts for professional advice. The outlook technical support team is available around the clock to help. So call the engineer’s today and find an easy way to schedule your emails