How to Repair Office 365 on Windows 10 Easily
Every business needs productivity tools that facilitate it to collaborate, communicate, and create efficiencies. Such productivity tools help professionals to complete their jobs quickly from anywhere. Microsoft’s productivity suite, Office 365, is replete with great applications, like Excel, Exchange, SharePoint, Teams, and many others. It’s cloud-based software, and so anyone can use these tools to work from anywhere. All they need is a good internet connection.
Outlook is a popularly used email application that Microsoft offers to its users. It comes with an Office 365 subscription. However, many people have reported certain issues when using it. Since it often stops working, users search for an answer to their query, how to repair Office 365.
This problem is especially prevalent with Windows 10 users. For those who use the application for official mails, repairing it is imperative. This article will provide you with the best ways to repair Office 365 on Windows 10.
Also Check: How To Set up MS Office 365 Email?
How to Repair Office 365 on Windows 10?
Microsoft gives an Office 365 troubleshooting tool that is free of cost. The tool is Office Support and Recovery Assistant. It is quite helpful as it can fix a majority of the common issues concerning every MS Office 365 application. However, always know that although the tool can resolve most of the problems, there still might be specific issues that it is unable to resolve. Still, it can easily fix interruptions in the Outlook app.
Follow these steps to repair Outlook 365 on Windows 10 using the Support and Recovery Assistant.
- Download the Support and Recovery Assistant tool from the official Microsoft website, www.support.microsoft.com.
- Remember to install this tool on the affected machine so that it can diagnose and troubleshoot the problem you are facing.
- After you download the Assistant, launch it.
- Next, select the application that you need to troubleshoot. Select it from the list and then click ‘Next.’
- Next, select the issue you are facing. You need to choose the problem descriptions that match the issue you are encountering. After that, tap ‘Next.’
- Now choose ‘Yes’ when you’re asked if this is the machine having problems. To proceed, click ‘Next.’
- Now, sign in to the Office 365 account. You should be able to notice a login page for Office 365. Login using your email and password. Tap ‘Next’ to start the diagnosis.
- After Microsoft has checked all probable solutions to your issue, you will see a diagnosis report is displayed on the screen. You will also see a summary of all the actions that the Support and Recovery Assistant tool executed on your machine.
- If you find that your issue was not resolved automatically, you can decide to obtain advanced diagnostics from the Support and Recovery Assistant in order to produce a comprehensive report.
How to Obtain Advanced Diagnostics from the Support and Recovery Assistant?
Remember that this choice is only available for Exchange and Outlook presently. To get advanced diagnostics, follow the steps below.
- Launch the Support and Recovery Assistant and choose the option of ‘Advanced Diagnostics.’
- In case you are operating with a Microsoft support agent, check the option at the bottom part that says, ‘I am working with Microsoft support personnel on this issue.’
- Choose your Outlook type from the given options.
- Choose the first option to see your Exchange Online connection.
- If the tool is unable to find anything, check the second option to conduct an authentication check on your mail ID.
- After the tool completes the validation, you will get a comprehensive diagnostics report. Share it with an MS support technician to gauge the problem better.
Also Check: How to Troubleshoot Office 365 Not Activating Issues
How to Repair Office 365 Using the Repair Mode?
If the Support and Recovery Assistant tool from Microsoft was unable to repair Outlook 365 on Windows 10 for you, then you can fix it through the repair mode. To repair it in this manner, go through the list of steps mentioned below.
- Navigate to the ‘Start menu, and tap on the icon of ‘Setting’ in order to launch the Settings. Alternatively, you can also input Settings on the search bar.
- Choose ‘Apps & features.’ It will showcase all the apps that are installed on Windows 10. Locate Microsoft 365 app. Tap on it to see the list of available options. Locate the two options of ‘Change’ and ‘Uninstall.’
- Tap on the button of ‘Change’ to repair Outlook 365 on Windows 10.
- After you tap ‘Modify’, you will see the ‘User Account Control Prompt’ on the screen. To launch the repair dialogue box, tap ‘Yes.’
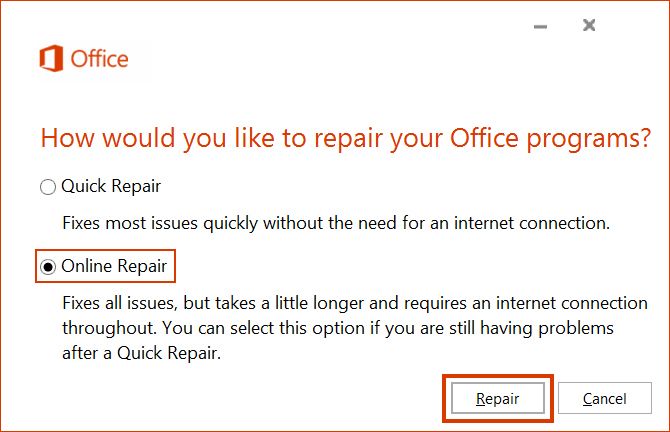
- There are mainly two methods that can help you to troubleshoot Office 365 apps. They are ‘Quick Repair’ and ‘Online Repair.’ The former fixes frequent problems speedily. The ‘Online Repair’ entails re-installing Office 365 apps to troubleshoot all issues with them.
Repair Office 365 by Using Quick Repair and Online Repair Methods
Both these methods are helpful. But if you select the ‘Online Repair’ method, there is a possibility of you losing Office 365 settings and customization.
A) Using the Quick Repair method
- Choose ‘Quick Repair’ and then tap ‘Repair.’

- To begin the repairing process, tap on ‘Repair’ in the confirmation window.
B) Using the Online Repair method
- Choose ‘Online Repair’ and tap ‘Repair.’ You’ll see a notification displaying ‘We’ll download files to repair your installation.’
- Tap ‘Repair’ to begin the repairing process.
- After the process of ‘Online Repair’ completes, you’ll see a message saying ‘Office 365 is installed now’ on your screen. To end this process, tap ‘Close.’
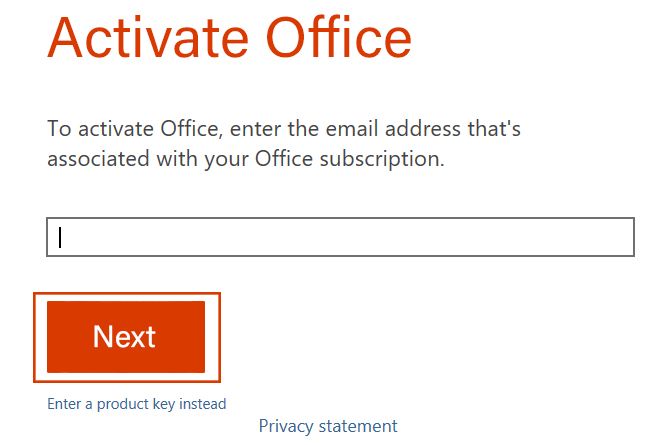
- Launch Outlook on your device and input that email address by which you have subscribed to Office 365. An Office app copy will get activated on your Windows 10 system. You can also use the product key to activate Office 365.
Also Check, How to Fix:- Office 365 Issues
Conclusion
Now you know how to repair Office 365 using Microsoft Support and Recovery Assistant and obtain advanced diagnostics if you have Exchange and Outlook. Use the Quick Repair method if you want fast troubleshooting of common errors. For any additional assistance, don’t hesitate to seek the services of customer support personnel who are always glad to assist you 24/7.