Use Outlook Mail Merge and Send Personalized Bulk Messages
The Outlook email client is a robust personal information manager that facilitates a seamless mail exchange, calendar management, and contact storage. One of the most dynamic functionalities is the Outlook mail merge. This feature is perfect for those wanting to send emails to a big list of individuals. At the same time, the number isn’t large enough to justify using professional marketing automation software.
What’s great about mail merge is that you can send personalized emails to a big group of people without any of them knowing who else the message has been sent to. Thus, your bulk messages look more personal. There are a couple of ways to perform mail merge in Outlook. Read about them in detail below.
Mail Merge in Outlook – Key Points to Note
- To use mail merge and send bulk emails, use either a MAPI-compatible program, such as Outlook or Gmail.
- To carry out Outlook mail merge with attachments, set Outlook in offline mode.
- Users can also perform a mail merge from Word using Outlook as a source.
- If you want to send bulk emails through Outlook, but the data isn’t in the application, perform a mail merge from within Word.
What Is Outlook Email Merge?
This functionality in Outlook makes it easy for users to dispatch custom messages to a section of users. In a way, it makes bulk messages appear as if they have been sent personally. For example, by using mail merge, you can send a group of people their credentials or greetings for a specific occasion.
This feature in Outlook imports your contacts and sends them an individual email automatically. It is essential that you perform the correctly in Outlook so that your recipients find the needed message.
How to Do Outlook Mail Merge in Windows
Performing the mail merge needs you to adhere to six major steps. These include the following:
1. Set up your main document.
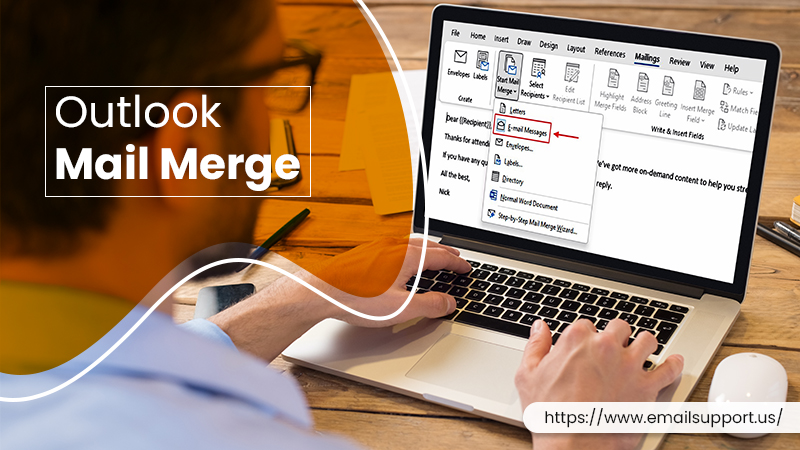
The first step in utilizing mail merge is preparing your document. To do so, navigate to ‘Mailings’ followed by ‘Start Mail Merge.’ Lastly, select ‘E-mail messages.’
2. Configure the mailing list.
You can now set up your mailing list. It will function as your data source. Create a contact list or group using these points.
- Choose ‘People’ in the navigation bar.
- Select ‘Home’ followed by ‘New contact group.’
- Type out the group’s name.
- Choose ‘Contact group’ followed by ‘Add numbers.’
- There will be various options to select from Outlook contacts, address book, or new email contact.
- Now, add people from your contact list and select ‘OK.’
- Save it.
POINT TO NOTE : This mailing list will be your source of data. Other data sources that you can employ for mail merge in Outlook are making a new list, or using an existing list, such as an Excel spreadsheet or Access database. You can also use other database files. But for that, employ the Data Connection Wizard.
3. Connect your connect to your message.
Your data source should have an email address column so everyone’s ID is present.
- In ‘Mailings,’ choose ‘Select recipients’ option.
- Now pick a data source.
- Select ‘File’ followed by ‘Save.’
4. Add the email message content
This is where you can add your personalized content to the message.
- In ‘Mailings,’ choose the ‘Greeting line’ option.
- Select your preferred format.
- To insert the merge field, select ‘OK.’
- Tap ‘File’ followed by ‘Save.’
- To make modifications in the size, spacing, or font of the merged content, choose the name of the merged field and make these modifications.
5. Review the result and complete the process.
You are almost done performing Outlook mail merge email. Follow these points to preview the final result and finish the process.
- Select ‘Preview results.’
- Now select the ‘Previous’ or the ‘Next’ options. This will allow you to view the email IDs and names of the recipients in the body of the message.
- Tap ‘Finish & Merge’ followed by ‘Send E-mail messages.’
- Select the ‘E-mail address’ column in the To box.
- Input a subject line in the Subject Line box.
- Select ‘HTML’ in the Mail Format box.
- If you want to dispatch the document as the email’s body, choose ‘Plain Text.’
- Use any of these options below ‘Send Records.’
- ‘All’ records – This is configured as the default option.
- ‘Current record’ – The record showing on your screen is sent to the email.
- Send a range of records using ‘From’ and ‘To.’
- Finally, execute mail merge by tapping ‘OK.’
6. Save the email
Save your custom message by going to ‘File’ and tapping ‘Save’ in Outlook. This process will also save the email’s connection to the data source. If you wish to use this message again, open the main document. Then tap ‘Yes’ when the prompt to retain the connection to the data source appears.
How to Add Attachment to Mail Merge in Outlook
You can only manually add the attachment in Outlook. Use this method to add Outlook mail merge attachments.
- Go to the ‘Send/Receive’ tab.
- Tap ‘Work Offline.’
- Make a mail merge and head back to Outlook.
- In your outbox folder, add an attachment to every email.
- Now, disable the ‘Work Offline’ mode.
Perform Mail Merge from Word
You can use Outlook as a source and do a mail merge from Word. There’s not any substantial difference in the final result. Follow these points to perform mail merge and send a message to a specific number of contacts.
- Open the Mail Merge Wizard. Do so by choosing the ‘Mailings’ tab followed by tapping the ‘Start Mail Merge’ button.
- The task pane panel will show. Here, on the right side, select ‘E-mail messages.’
- Hit ‘Next.’
- Now, select the document to begin from.
- Tap ‘Next.’
- Now, you will use Outlook as a source.
- Tap ‘Select’ from Outlook contacts.
- Outlook can have various contacts folders.
- Press the ‘Choose Contacts Folder’ option and select the needed folder.
- You will find the ‘Choose Profile Dialog’ on your screen.
- Hit the ‘OK’ button.
- MS Word will launch the ‘Mail Merge Recipients’ dialog.
- Here you can choose the contacts to whom you want to send the message.
- You will see many selecting and filtering options.
- Your screen will also be refreshed after your every action.
- If you need to use the whole contacts folder, choose the ‘Find Duplicates’ feature.
- Now, start writing the email content.
- After writing the message, preview the emails that will be sent.
- After that, press ‘Electronic mail…’
- This will let you configure the final options.
- In the dialog that shows, fill in the email address and the subject line.
- Lastly, press ‘OK.’
- The program will start sending your messages.
Also Read: How to Create an Email Group in Outlook?
Perform Mail Merge Within MS Word
This option is suitable for those who want to execute mail merge in Outlook, but the data isn’t in Outlook. In this case, doing a mail merge from within Microsoft Word will be the right choice.
- In the Mail Merge Wizard, choose a document to begin.
- Tap the ‘Use an existing list’ option.
- Now tap ‘Browse…’
- Choose the document’s location. This can be any source, such as database queries or Excel sheets.
- Match the fields from your document’s source to the mail merge fields.
- Tap the ‘Match fields’ button.
- You will see a dialog with the usual merge fields in Word.
- Use them in the standardized templates.
- Beside the Last name field, there will be a drop-down list. Expand it and set it to the column in your document source with that data.
- Close the dialog box by tapping ‘OK.’
- Proceed with mail merge as mentioned in the section above.
- When the dialog box to send emails appear, set the To field to the column with the list of email IDs you want to send to.
Also Read: How to Create an Email Template in Outlook, Edit, and Use It
Frequently Asked Questions
1. How to do the mail merge in Outlook?
To do mail merge in Outlook, prepare your main document by starting the mail merge in the ‘Mailings’ section. Configure the mailing list, then select recipients and link this list to the email message. You can now add your greeting line and the message. Preview it and select ‘OK’ to run the mail merge feature.
2. What are the six steps of mail merge?
The six steps of mail merge begin with preparing your document and setting up the mailing list. After that, connect this list to your email message. Add your content to the message, preview the result, and save the personalized message.
3. Can I send mass emails with Outlook?
Yes, you can send mass emails with Outlook individually to a set of people using the mail merge feature. Use this feature to send a mass email to your employees and customers. You can personalize it as per the recipients.
4. How to send 5000 emails at once?
You can employ the mail merge functionality in Outlook to send as many as 10000 emails in a day. It is possible to personalize the messages and mass mail them. Every message will go to a separate address.
5. Where is the mail merge located in Outlook?
The mail merge field is located in the ‘Mailings’ tab in Outlook. If you want to execute mail merge with the Outlook contacts list, go to ‘Tools’ and tap ‘Letters and Mailings.’ Here you will find the Mail Merge Wizard.
6. What is the Outlook plugin for mail merge?
There are various plugins you can use to perform mail merge. Some great ones include MergeTools and Easy Mail Merge. These tools will let you personalize messages that you can send to many people at once.
Final Words
Use Outlook mail merge whenever you wish to send custom emails to many people at once. The functionality is quite convenient. You can also perform the merge function with MS Word. If you have any more queries regarding this process, connect with an email technical expert.
Written By
John
John is a Technical Writer at Email Support, has 10 years of experience, and is an expert in Email and Cloud Computing. His specialty is writing about the Email clients such as Outlook, Yahoo, Verizon, SBCGlobal, Gmail, Apple Mail, AOL, WildBlue, and others.